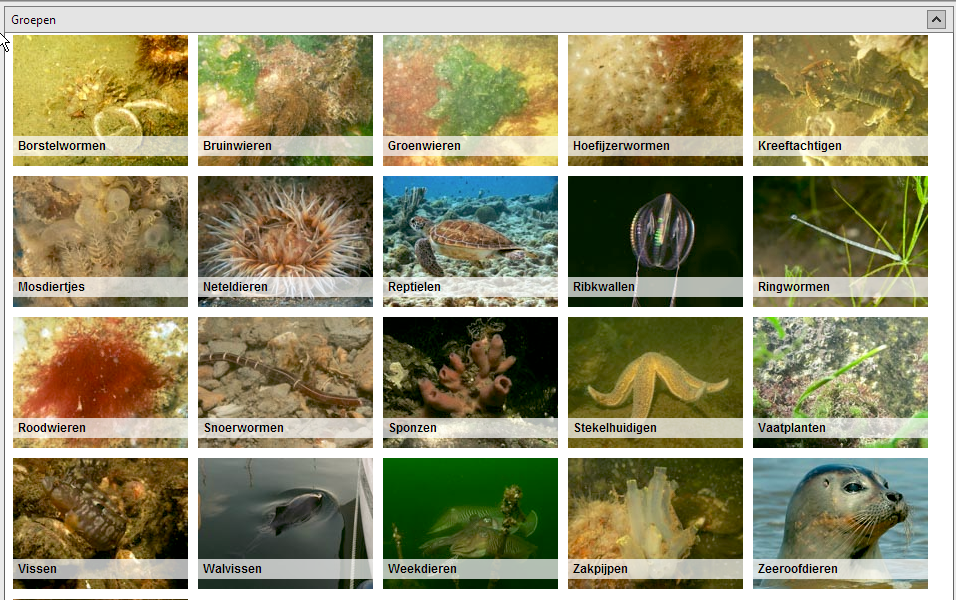
Hier komt de help van de soorteninformatie te staan.
Begrippenlijst wieren
| begrip |
uitleg |
| Abudantie |
Een
maat voor de frequentie van voorkomen van een plantensoort op een
bepaalde
oppervlakte. |
| Antheridium |
Orgaan
waarin mannelijke gameten gevormd worden. |
| Aphotisch
zone |
Zone
in de waterkolom waarin de geen licht doordringt. Hierdoor is
fotosynthese
niet mogelijk.
|
| Aplanosporen |
Onbewegelijke
sporen. |
| Carpogonium |
Vrouwelijke
geslachtsorgaan waarin eicel gevormd en bevrucht wordt |
Carposporen
|
Sporen
gevormd na bevruchting van carpogonium, meestal met
carposporofyt als tussenfase.
|
Carposporofyt
|
Meercellige
structuur die ontstaat uit een bevrucht carpogonium en vastzit op
de vrouwelijke gametofyt.
|
| Cellumen |
Interne
ruimten in de cel, omgeven door de celwand. |
| Chromatofoor |
Drager
van de pigmenten die voor fotosynthese zorgen, ook wel chloroplast
genoemd.
|
| Cortex
(=schors) |
Perifere
cellagen in planten waar inwendig meerdere soorten cellen te
onderscheiden
zijn. |
| Differentiatie |
Inwendig;
er zijn meerdere vormen cellen te onderscheiden, bijvoorbeeld
differentiatie
in cortex en epidermis.
Uitwendig;
er zijn verschillend gevormde delen aan de plant te herkennen,
bijvoorbeeld
een vasthechtingsorgaan, een steel en een bladachtig deel. |
| Diploïd |
Het
dubbele chromosoomaantal bevattend, in de celkern bevinden zich van
elk type chromosoom twee exemplaren. |
| Eulitoraal |
In
de getijdezone voorkomende; ook wel getijdezone zelf. |
| Epidermis |
Aan
de oppervlakte gelegen cellaag. |
| Expositie |
Blootstelling
aan bepaalde milieufactoren. |
| Fragmentatie |
Opdeling
als vorm van vegetatieve vermeerdering. |
| Gametangium |
Geslachtsorgaan
waarin gameten gevormd worden. |
| Gameten |
Geslachtscellen,
de haploïde cellen die versmelten tot zygote. |
| Gametofyt |
Geslachtelijke
plant.
|
| Haploïd |
Het
enkelvoudige chromosoomaantal bevattend, in de celkern bevindt zich
van elk type chromosoom een exemplaar.
|
| Isogamie |
Geslachtelijke
voortplanting door copulatie van twee identieke gameten. |
| Parenchym |
Celweefsel,
meestal met grote cellumina en relatief kleine cellulaire ruimten.
Perifeer
Aan de buitenkant of rand gelegen.
|
| Photische
zone |
Zone
in de waterkolom waar licht doordringt. |
| Pluriloculair |
uit
vele cellen opgebouwd(sporangia of gametangia). |
| Sifonaal |
Plant
bestaat in principe uit een enkele cel met vele kernen en
chromatoforen, tussenwanden ontbreken dus. |
| Spermatangium |
Antheridium
van roodwieren, vormt meestal een onbewegelijk spermatium. |
Sporangium
|
Voortplantingsorgaan
dat ongeslachtelijke sporen levert.
|
| Sporofyt |
Speciaal
bladvormig aanhangsel dat sporangia draagt. |
| Sublitoraal |
Gebied
beneden laagwaterniveau, valt niet droog. |
| Supralitoraal |
Gebied
boven hoogwaterniveau, ligt altijd boven water, maar staat onder
invloed
van spatwater. |
| Tetrasporangium |
Sporangium
waarin vier sporen ontstaan. |
| Tetrasporen |
Sporen
in een tetrasporangium ontstaan.
|
| Tetrasporofyt |
Vrij
levende diploïde generatie bij de roodwieren, vormt tetrasporangia
als
voortplantingsorgaan.
|
| Thallus |
Plant
die niet is gedifferentieerd in wortels, stengels en bladeren;
zogenaamde lagere planten en speciaal zeewieren bevatten een
thallus. Bij zeewieren waaraan uitwendig wortel-, stengel- en
bladachtige delen te onderscheiden zijn, hebben deze delen een
veel eenvoudiger anatomie dan de overeenkomstige delen van hogere
planten.
|
| Uniloculair |
Sporangia
met inhoud die zich opdeelt zonder dat tussenwanden worden
gevormd. |
| Zoösporen |
Geflagelleerde
sporen. |
| Zygote |
Bevruchte
eicel. |
Burgerwetenschap (citizen science)
Spons spicula preparatie
There are several ways to prepare microscopic slides necessary for taxonomic identification. Two are in general use and relatively simple: spicule preparations and hand sections (see "Thick sections").
Spicule preparations:
Two methods are here described, bleach and nitric acid preparations.
A. Bleach preparation:This is a "quick and dirty" method, suitable for quick identifications of all spicule bearing sponges including Calcarea.
You will need:
-small plastic containers like eppendorfs
-undiluted domestic bleach
-96% ethanol in squeeze bottle
-distilled water in squeeze bottle
-razor blades or scalpels
-petri dish for cutting sponge
-disposable pipettes
1. Cut a small portion of ectosome and choanosome (3 cubic mm) on petri dish, and place in eppendorf (rinse off utensils between specimens). Label lid eppendorf with specimen number.
2. Half fill each eppendorf with bleach and let sit for 30-60 minutes depending on the consistency of the sponge.NOTE: If you don't need a permanent mount of your spicules, you can look at the spicule- bleach suspension pipetted out of the eppendorf and spread on a slide topped with a coverslip. The slide can then be washed and re-used.
3. Pipette off as much bleach carefully as possible without disturbing dissolved tissue andspicules.
4. Squirt in water to carefully resuspend spicules; let spicules settle over 10-15 minutes; repeat several times.
5. Pipette off water as in step 3 and refill with 100% ethanol to resuspend spicules.
6. Aspirate spicule suspension into pipette.
7. Gently squirt onto warming slide, spread around a little with pipette tip, dry off ethanol, add mounting medium, and add a coverslip.
B. Nitric acid spicule preparations:
This technique will give you very clean spicules that are suitable for the examination ofmicroscleres and scanning electron microscopy. It is not suitable for Calcarea.
You will need:
-nitric acid * (HNO3) in glass
-ddH20 in squeeze bottle
-96% ethanol in squeeze bottle
-plastic centrifugetubes
-50ml Erlenmeyer flasks
-petri dishes
-razor blades or scalpels
-disposable pipettes
-slides, coverslips
-desk-top centrifuge
* CAUTION: HIGHLY CORROSIVE, DO NOT INHALE FUMES, WEAR GLOVES,LABCOAT, SAFETY GLASSES. Do as many manipulations as possible with nitric acid under a fume hood.
1. Cut a small portion of ectosome and choanosome (3 cubic mm) on a petri dish, and place in an erlenmeyer flask or centrifugetube (rinse off utensils between specimens to avoid cross- contamination from other species)
2. UNDER FUME HOOD AND VERY, VERY CAREFULLY (WITH GLOVES, LAB COAT, AND SAFETY GLASSES), pour nitric acid into flasks or centrifugetubes to just cover sponge (not too much or it will bubble over and won't fit in centrifugetube), allow to sit for as long as it takes to dissolve all tissue (over lunch) or heat gently over a Bunsen flame, heating block, or microwave (5-10 seconds). Swirl contents until all brown gas is boiled off and liquid is clear, pale yellow. Hold mouth of flask or centrifugetube away from you with claspers.
3. Pour contents of each flask into the appropriately labelled centrifugetube (if you are already using centrifugetube you are already OK), line all up in rack, balance with ddH20 by eye, place in centrifuge, spin 3-5 min at 3000 rpm.
4. Tip off nitric acid into a plastic container in sink being constantly filled with tap water (to immediately dilute acid). Do this with a quick action so as not to disturb pellet.
5. Fill centrifugetube half way with ddH2O dislodging pellet. If you can't dislodge pellet, cap and shake. Balance all centrifugetubes with water and spin as in step 3.
6. Tip off water as in step 4, squirt in ethanol as in step 5, spin.
7. During this spin turn on slide heater tray, have slides cleaned, labelled, and heating on tray.
8. Pour off ethanol, trying to retain a little to flick and resuspend the pellet. If you can't do this add a small squirt of ethanol to dilute spicules.
9. Pipette spicules on to warming slides, changing pipettes in between specimens (or wash in a large beaker), allow to dry, don't sneeze!
10. Lay coverslips out on a clean sheet of paper, pipette an appropriate amount ofmountant onto slip one at a time, overturn slide and gently lower onto coverslip FROM ONE SIDE (TO AVOID BUBBLES)- Quickly turn the slide and c-slip right-side-up and allow to dry overnight at room temp (drying ovens make the mountant shrink).For SEM preparations similar procedures (except for step 10) can be employed.
Source: Kelly-Borges, M. and S.A. Pomponi, 1992. A simple fool's guide to sponge classification. Harbor Branch Oceanographic Institute, Fort Pierce, Fla.
Thick sections
These are necessary to study the skeletal structure of a sponge. In the case of sponges without spicules they are the only means of microscopic recognition.
Here is how you do it best:
a. Leave the sponge in 70 % alcohol for at least 24 hours (preferably longer) to harden.
b. Cut thin slices from the sponge - not too thin, or very few whole spicules will be included. Include slices from the surface, at right angles to the surface to include surface and deeper tissue, and if the sponge has an axial structure, a longitudinal slice from the middle.
c. To cut sections, use a safety, or a 'cut throat' razor, or an ordinary razor blade; surgical scalpels with removable blades are also convenient. For firm sponges a sawing action is best and for soft ones a single, decisive stroke. Sharpen the 'cut throat' razor on a smooth oil stone before cutting each section. Spicules are harder than steel.
d. Run alcohol over the sections on a small watchglass until they are free of water.
e. Transfer the sections to another watchglass and add a few drops of clove oil or xylol and leave until the sections look translucent. A milky look indicates that water remains in the sections - go back to alcohol again. Clove oil (or xylol) goes milky if the mounting is performed in a damp atmosphere, so don't breath on it. Xylol does not inhibit the setting of Canada balsam so much. However, clove oil is more easily obtainable, and has some dessication properties of its own.
f. Transfer the sections to a slide, and mount in Canada balsam or Euparol (which has slight dessication properties). Ensure the slide label identifies the position of the sections.
g. Leave to dry for several months; the presence of clove oil increases the dryingtime of Canada balsam dramatically. A slightly raised temperature, such as in an airing cupboard, accelerates the process. (Source: Ackers, R.G., D. Moss, B.E. Picton and S.M.K. Stone, 1985. Sponges of the British Isles ("Sponge IV"). I. Marine Conservation Soc., Ross on Wye, U.K.: 1-107.)
An even more simple approach which nevertheless gives good results with many sponges, is to put the section after step "d" on a microscope slide on a heating plate and let it dry. The section will shrink and some deformation of the skeletal structure will happen, but in most cases the basic architecture as well as the zonation of the spicules will remain intact. The dried section can be mounted in Canada balsam or other mounting media such as Entallan. An added advantage of this simple method is that all spicules including microscleres will stay in situ.
Source: Rob van Soest
For species without spicular skeletons it is often necessary to make paraffin embedded sections, either with the microtome (thickness 20-100 µm) or with the hand. Deparaffinated sections can be stained by multipurpose stains to enable recognition of cellular structures. Extensive description of paraffin embedding and histological techniques is beyond the scope of this Introduction.